If you ask Flick, I have a little streak of hippie in me :) Over the years I have lost my hemp necklaces, it's been awhile since I've seen Phish live, and I actually own skinny jeans. This doesn't mean that my wiring has changed though. Fortunately, living in Boulder makes my "hippie tendencies" seem a bit more mainstream. We live in a place where the town picks up garbage, recycling, and compost, we have a garden full of veggies, do yoga, hike, camp, and ride our bikes everywhere without anyone so much as batting an eye. They even charge you 5 cents if you have to use plastic grocery bags at the grocery store! I think these things are pretty darn normal, but I also have been living in "the bubble" for about 8 years now.
I did do something this weekend that really tapped into my crunchy side - I made my own granola bars. Yikes, pass the petrulli oil.
The thing is, they are REALLY delicious and not at all hard to make. I got the recipe recommendation from one of my coworkers, made a few tweaks, and voila, energy packed little snack-lets that Flick and I have been crushing all weekend. We didn't have as many pecans as the recipe calls for so I added more sliced almonds. Also, you can take-or-leave the coconut - I added them and like the slight coconut flavor. I hope you enjoy these as much as we do!
Peanut Butter Granola Bars
recipe adapted from Emeril
4 tablespoons unsalted butter
1/4 cup honey
3 cups old-fashioned oats
1/2 cups sliced almonds
1/2 cup roughly chopped pecans
1/4 cup hulled green pumpkin seeds
1/4 cup unsalted sunflower seeds
1/4 cup grated coconut
1/2 teaspoon ground cinnamon
1/4 teaspoon salt
1 cup raisins
1/3 cup light brown sugar
1/2 cup honey
1/2 cup creamy peanut butter
Preheat oven to 325 degrees and lightly grease an 8x8 baking dish (you can use a larger dish for thinner bars).
Melt butter with 1/4 cup honey in a small saucepan over low heat, stirring frequently.
In a large bowl, combine the oats, almonds, pecans, pumpkin seeds, sunflower seeds, coconut, cinnamon and salt. Mix well. Pour the butter/honey mixture over the oat mix and toss to coat well (lets now call this, granola). Spread the granola mixture in a thin layer on a baking sheet (jelly roll pan works great). Bake for 20 minutes, stirring about every 5 minutes to ensure even toasting. The mix will stay soft, no need to bake for longer than 20 minutes.
Cool the granola in the pan and add raisins. Place granola in a large bowl.
Meanwhile, combine the brown sugar, 1/2 cup honey and peanut butter in a small saucepan over medium high heat. Stir constantly until the sugar dissolves and the mixture starts to boil/bubble. Pour the sugar/honey/peanut butter mix over the granola in the bowl and mix WELL. It is a little unwieldy to work but make sure to get all the granola mixed in (even the stuff on the bottom) - any "dry" granola won't stick in the bars.
Press the granola mix into the greased pan and allow to cool. Cut into bars of whatever size you choose and when cool, store in an air-tight container at room temperature (for up to a week). To freeze, wrap individual bars in plastic wrap and put in a freezer bag.
Monday, September 1, 2014
Thursday, July 10, 2014
Salted Caramel Brownies
With a name like "Salted Caramel Brownie", I think we can let the brownie do the talking. This whole "salty sweet" dessert movement is something I am happy to throw my weight behind. I had my first salted chocolate about 3 years ago and haven't looked back.
The quest for a good Salted Caramel Brownie recipe started back at Christmas-time...it only took me about 8 months to finally get to making these little buggers. I am really glad that I took a little time with these and made a couple different caramels to get just the right topping that I had in my head. Life's too short to spend time eating "meh" desserts.
Flick and I are dessert-a-holics (Ellie is one in the making) and I love to bake so we are not wired to skip the sweets in our house. I follow a blog authored by Nicole DeBoom, the founder of Skirt Sports (a pretty rad women's athletic company if you have a chance to check them out...), and she recently posted about her newly hatched fitness motivation: "Dessert Challenge". Doesn't that sound like something worth undertaking? The long and short of it is, as a working mom with a crazy busy schedule, she is using dessert as a "carrot" to help motivate her daily workout.
As most of you know, not only do I love to bake, but I am an outdoor junky - get me on a bike, running on a trail, in a pool, or strapped into a pair of skis and you have one happy mama. That being said, it isn't always easy to work up the energy or motivation to get out there when sleep is in short order, work is super busy, and the to-do list at home is taking on a life of its own. My spin on the Dessert Challenge: I make the time to get outside and be active, I then treat myself to dessert at night, which means I get to bake more so that we have sweets (a.k.a.: motivation) around the house. Triple win. Endorphins, deliciousness, and making time for my hobbies - bring it!
I know you are really here for the recipe so here you go. The brownies are really easy to make (one bowl) and while they are baking, you can work on the caramel so the total time invested really isn't too bad...and they are pretty rich so they can last awhile too (try freezing for even more longevity)!
Salted Caramel Brownies
Brownies (adapted for 5,000ft - sea level adjustments are in parentheses)
recipe courtesy of "Pie in the Sky"
1/2 cup dutch process cocoa
1/2 cup + 1 tablespoon all purpose flour (1/2 cup at sea level)
1 cup minus 1 tablespoon granulated sugar (1 cup at sea level)
1/4 teaspoon salt (1/8 teaspoon at sea level)
3 large eggs (2 eggs at sea level)
1 teaspoon vanilla extract
8 tablespoons (1 stick) butter, melted and cooled (6 tablespoons at sea level)
1 cup semi-sweet chocolate chips or 6 oz coarsely chopped chocolate
Coat an 8 inch square baking pan with butter (I usually take a cold stick out of the fridge, unwrap the end and rub it all over the bottom and sides of the pan). Preheat the oven to 375 degrees (325 degrees at sea-level).
In a large bowl, whisk together the cocoa, flour, sugar and salt. Make a well in the middle and add in the eggs, vanilla, and melted/cooled butter.
Whisk together the wet ingredients and then begin to work in the dry ingredients. Add the chocolate chips and using a large spoon, stir/mix until everything is well incorporated. The batter will be thick.
Scoop the batter into the greased pan and bake for about 30 min (35 min at sea level). This will be very dependent on your oven so you will have to use some judgement. The brownies will look dry on top and will start to pull away from the sides. A cake tester or toothpick should have some moist crumbs on it (it shouldn't "jiggle" like jello when you take it out). We tend to have to cook longer in our oven so if yours is a hot one, keep this in mind.
Cool the brownies in the pan on a wire rack.
Salted Caramel
recipe courtesy of sally'sbakingaddiction
1 cup granulated sugar
6 tablespoons of butter (cut into 6 pieces, 1 tablespoon each)
1/2 cup heavy cream (or whipping cream)
1 teaspoon salt
Heat granulated sugar in a saucepan over medium heat, stirring constantly with a rubber spatula (so it doesn't stick as much). The sugar will get clumpy and darken and will turn into a syrupy, amber colored liquid. Keep stirring until it is all melted in, being careful not to burn the sugar.
Once sugar is melted, add the butter - the caramel will bubble up once the butter is added, stir it into the caramel until the butter is melted (2-3 min).
Slowly drizzle in the heavy cream to the butter/sugar mixture. Again, it will bubble up - keep an eye on it and stir/let boil for about a minute.
Remove from the heat and stir in the salt. Allow to cool down.
To pull it all together, take the cooled caramel and drizzle it over the cooled brownies. Use as much or as little as you like. The extra caramel can be stored in a sealed container in the fridge for other uses...
The caramel will stay gooey - if you want it more firm, keep the brownies in the fridge (this is what we did). I took some of them to work where they were quickly polished off and Flick and I managed to get through the rest of them. Tough job, but someone's gotta do it.
The quest for a good Salted Caramel Brownie recipe started back at Christmas-time...it only took me about 8 months to finally get to making these little buggers. I am really glad that I took a little time with these and made a couple different caramels to get just the right topping that I had in my head. Life's too short to spend time eating "meh" desserts.
![]() |
| Now that's the stuff... |
As most of you know, not only do I love to bake, but I am an outdoor junky - get me on a bike, running on a trail, in a pool, or strapped into a pair of skis and you have one happy mama. That being said, it isn't always easy to work up the energy or motivation to get out there when sleep is in short order, work is super busy, and the to-do list at home is taking on a life of its own. My spin on the Dessert Challenge: I make the time to get outside and be active, I then treat myself to dessert at night, which means I get to bake more so that we have sweets (a.k.a.: motivation) around the house. Triple win. Endorphins, deliciousness, and making time for my hobbies - bring it!
I know you are really here for the recipe so here you go. The brownies are really easy to make (one bowl) and while they are baking, you can work on the caramel so the total time invested really isn't too bad...and they are pretty rich so they can last awhile too (try freezing for even more longevity)!
Salted Caramel Brownies
Brownies (adapted for 5,000ft - sea level adjustments are in parentheses)
recipe courtesy of "Pie in the Sky"
1/2 cup dutch process cocoa
1/2 cup + 1 tablespoon all purpose flour (1/2 cup at sea level)
1 cup minus 1 tablespoon granulated sugar (1 cup at sea level)
1/4 teaspoon salt (1/8 teaspoon at sea level)
3 large eggs (2 eggs at sea level)
1 teaspoon vanilla extract
8 tablespoons (1 stick) butter, melted and cooled (6 tablespoons at sea level)
1 cup semi-sweet chocolate chips or 6 oz coarsely chopped chocolate
Coat an 8 inch square baking pan with butter (I usually take a cold stick out of the fridge, unwrap the end and rub it all over the bottom and sides of the pan). Preheat the oven to 375 degrees (325 degrees at sea-level).
In a large bowl, whisk together the cocoa, flour, sugar and salt. Make a well in the middle and add in the eggs, vanilla, and melted/cooled butter.
Whisk together the wet ingredients and then begin to work in the dry ingredients. Add the chocolate chips and using a large spoon, stir/mix until everything is well incorporated. The batter will be thick.
Scoop the batter into the greased pan and bake for about 30 min (35 min at sea level). This will be very dependent on your oven so you will have to use some judgement. The brownies will look dry on top and will start to pull away from the sides. A cake tester or toothpick should have some moist crumbs on it (it shouldn't "jiggle" like jello when you take it out). We tend to have to cook longer in our oven so if yours is a hot one, keep this in mind.
Cool the brownies in the pan on a wire rack.
Salted Caramel
recipe courtesy of sally'sbakingaddiction
1 cup granulated sugar
6 tablespoons of butter (cut into 6 pieces, 1 tablespoon each)
1/2 cup heavy cream (or whipping cream)
1 teaspoon salt
Heat granulated sugar in a saucepan over medium heat, stirring constantly with a rubber spatula (so it doesn't stick as much). The sugar will get clumpy and darken and will turn into a syrupy, amber colored liquid. Keep stirring until it is all melted in, being careful not to burn the sugar.
Once sugar is melted, add the butter - the caramel will bubble up once the butter is added, stir it into the caramel until the butter is melted (2-3 min).
Slowly drizzle in the heavy cream to the butter/sugar mixture. Again, it will bubble up - keep an eye on it and stir/let boil for about a minute.
Remove from the heat and stir in the salt. Allow to cool down.
To pull it all together, take the cooled caramel and drizzle it over the cooled brownies. Use as much or as little as you like. The extra caramel can be stored in a sealed container in the fridge for other uses...
The caramel will stay gooey - if you want it more firm, keep the brownies in the fridge (this is what we did). I took some of them to work where they were quickly polished off and Flick and I managed to get through the rest of them. Tough job, but someone's gotta do it.
Friday, June 6, 2014
Happy Friday!
Aaaahhh, the weekend. I love Friday nights. They are easily the best nights of the week. No work tomorrow, the knowledge that I have two whole days to hack away at my to-do (and want-to-do) lists, and getting to spend some QT with Ellie and Flick that does not include rushing to and from daycare / work. Bliss.
Another thing I love about weekends is the potential to maybe, just maybe, cook without pressure. We are on a pretty tight schedule during the week (I know this is not unique to our family), so weeknight dinner can be an all out sprint to get food on the table as close to 6pm as possible. Don't get me wrong, I love every second of it! 30 rushed minutes in the kitchen is a heck of a lot better than 30 minutes doing a lot of other things...if you are me that is. But on the weekend...oh the possibilities. I'll be honest, more often than not, Saturdays and Sundays get away from us and it is yet another mad dash at to pull something together that won't have us eating too late for Ellie to maintain some semblance of a normal bedtime. However, there is at least a chance that I can get myself into the kitchen early enough to turn on the radio and calmly cook a meal...
With all this one-in-a-million talk (this should conclude the movie references) - I find recipes like the one for Shrimp Fettuccine Alfredo below to be indispensable when we need something quick, tasty, and appetizing for the whole family. The ingredients for this are not all that far-fetched so you may find that you even have them on hand in case dinner sneaks up and you need something in a pinch (mushrooms can be subbed in easily for the shrimp too, by the way). Ellie happens to be a shrimp-a-holic so this recipe is right in her wheel house. I find that the frozen, already peeled and deveined shrimp-in-a-bag can be a little tougher than the "ez-peel" ones we get from the fish counter (deveined and the shell is split so it comes off super easy). But by all means, if you are down with the bag, use it. We certainly have! TGIF
Shrimp Fettuccine Alfredo
Courtesy of Cooking Light
9 ounces of fettuccine (or linguine)
1 pound peeled and deveined medium shrimp
2 chopped green onions
2 minced garlic cloves
Olive Oil
1/2 cup grated parmesan cheese
1/3 cup half and half
3 tablespoons (or 1 1/2 ounces) cream cheese
1/4 teaspoon black pepper
Parsley for the finish (optional)
Cook the pasta according to the package directions. Towards the end of cooking, scoop out 1/4 cup of the pasta water to use with the shrimp.
In a small bowl, combine shrimp, green onions, and garlic.
Heat a large skillet over medium high heat. Add olive oil and swirl to coat the pan. Add the shrimp/onion/garlic mixture and saute for about 4 minutes or until the shrimp are done - remove from the pan and keep warm.
Turn the heat down to medium on the skillet and add the 1/4 cup cooking liquid from the pasta (if you forgot, no big deal, just use 1/4 cup water), parmesan cheese, half and half, cream cheese, and pepper. Cook about 2 minutes or until all the cheeses melt. Combine the pasta, cheese mixture, and shrimp mixture. If you are opting to do so, sprinkle with parsley. Best served not long after cooking but tastes fine as leftovers too!
Wednesday, May 28, 2014
Sweetness
Apparently they don't shut down your blog for lack of activity...holy smokes it has been awhile. I appreciate all the gentle nudges (and threats of violence) from those of you who were apparently missing the occasional EZ Peas-Z post over the past year (yikes). Seriously though, you are motivating for me and I appreciate it more than you know.
The 5 recipe a week thing I had originally set out to do turns out to be a little ambitious for this lady - so get ready for spontaneity and randomness (and a slightly new recipe format). I am aiming to keep you on your toes so that you have to check in more regularly (or sign up as a follower for those handy emails notifications...) in order to check out the latest hotness coming out of the Flickinger kitchen. Keep calm, they will still be easy and delicious since that is what we do here. Again, thanks for keeping after me and it feels good to be back!
Peach Pie - enough said? If I could only eat one type of dessert for the rest of my life, it would be pie. If I had to pick one pie...I would be in trouble. But peach would be up there! Peach Pie is relatively new to me. It is a little more time consuming than any other fruit pie which does not involve a pit (cherry pie straight up frightens me), but I assure you, it is well worth the effort. I am really into making mason jar pies these days so I'll include both the traditional as well as the mason jar instructions. I know it is early but I made my first peach pies of the season this past weekend and they were pretty tasty if I do say so myself. Don't be afraid of making a crust (it's not so bad...just keep it cold!) and enjoy the sweet reward at the end:
Peach Pie
Adapted from Smitten Kitchen
Crust:
2 cups flour
1 teaspoon salt
2/3 cup shortening
5 - 8 tablespoons ice cold water
Filling:
About 3 1/2 lbs peaches (so you end up with 6 cups sliced)
1 tablespoon fresh lemon juice
1/4 cup granulated sugar
1/4 cup light brown sugar
1/8 teaspoon cinnamon
sprinkle of nutmeg
1/8 teaspoon salt
2 tablespoons tapioca
To make the crust:
Combine flour and salt in a medium bowl. Cut in shortening using a pastry knife or 2 butter knives.
Sprinkle water into flour mixture one tablespoon at a time, tossing lightly with a fork. When it starts to come together, pick it up and form it into a ball. Divide the ball in half and flatten each half into a disc. Wrap each half in plastic wrap and refrigerate (it is SO much easier to work with cold dough if you are rolling it).
To make the filling:
Peel the peaches - if they are kind of hard, a vegetable peeler works just fine. If they are pretty soft, the peels may come off pretty easily. If it is giving you trouble, boil a big pot of water (and get an ice bath ready), make an "x" on the bottom of each peach and throw them in the water. Poach them for 2 minutes, take them out, and put them in the ice bath. Once they cool down a bit, try peeling them again and hopefully this helps!
Half and pit your peeled peaches and cut them into 1/3 inch slices. If you are doing the "mini" pies, chop them up roughly. Toss the peaches in a large bowl with the lemon juice.
In a small bowl, combine the sugars, cinnamon, nutmeg, salt, and tapioca. Toss this in with the peaches and stir to combine.
Put it all together:
Preheat the oven to 425 degrees.
For mason-jar pies - grab your 4oz mason jars and press pie dough into each jar, covering the bottoms and up the sides. You will want to use about half the dough. I probably start out making 7 jars just so I don't over-do it since you can always whip up a few more if you have too much filling.
Spoon filling into the jars up to the top. You can go a little over if you are going to bake them right away and don't need to worry about screwing the cap on. Go a little lighter on the filling if you are going to freeze them.
Once all the jars have filling in them, roll out the rest of the pie dough on a heavily floured surface with a heavily floured rolling pin. Use the lid of one of the jars to cut out circles in the dough and press it on top of the pie filling in the jar (push it down in there a bit so it is "in" the jar - it can get a little messy). Put a few slits in the top.
Place all the jars you are cooking on a foil lined baking sheet and bake for about 1/2 hour or until the pies are bubbling and brown on top.
For a traditional pie - take out your chilled dough discs and roll one of them out with a heavily floured rolling pin on a heavily floured surface.
Place the rolled out dough into a 9 inch pie plate. Lightly press it into place so there are no gaps between the crust and the pie plate. Pour the peach filling inside.
Ditto the rolling process with the second disc of dough (or make a lattice top if you are feeling fancy...). Gently place the second crust on top of the peach filling. Press the edges of the top and bottom crust together. Make some slits in the top of the pie and rub the crust with a little bit of milk (this makes it brown up reaaaal niiiice).
Bake pie for 20 min, reduce oven to 375 degrees and bake for another 30 to 40 min or until bubbly and brown (if browning too much, cover the pie loosely with foil). Cool pie completely if you don't want it to run (I dare you to try and cool this completely before devouring it).
NOTE: For the mason jar pies, if you want to freeze some for later, screw the lids on the pies before you bake them and stick 'em in the freezer. When you feel like having pie, take them out, remove the lids (important!), and place them on a foil lined baking sheet. Put the baking sheet with the pies in the oven and turn the oven on to 425 degrees and bake for about 45 minutes. The pies will defrost nicely in the preheating oven. Just keep an eye on them and take them out when they are bubbly and browning. MMMM...pie.
The 5 recipe a week thing I had originally set out to do turns out to be a little ambitious for this lady - so get ready for spontaneity and randomness (and a slightly new recipe format). I am aiming to keep you on your toes so that you have to check in more regularly (or sign up as a follower for those handy emails notifications...) in order to check out the latest hotness coming out of the Flickinger kitchen. Keep calm, they will still be easy and delicious since that is what we do here. Again, thanks for keeping after me and it feels good to be back!
![]() |
| I'm drooling...trust me, it was good. |
Peach Pie - enough said? If I could only eat one type of dessert for the rest of my life, it would be pie. If I had to pick one pie...I would be in trouble. But peach would be up there! Peach Pie is relatively new to me. It is a little more time consuming than any other fruit pie which does not involve a pit (cherry pie straight up frightens me), but I assure you, it is well worth the effort. I am really into making mason jar pies these days so I'll include both the traditional as well as the mason jar instructions. I know it is early but I made my first peach pies of the season this past weekend and they were pretty tasty if I do say so myself. Don't be afraid of making a crust (it's not so bad...just keep it cold!) and enjoy the sweet reward at the end:
Peach Pie
Adapted from Smitten Kitchen
Crust:
2 cups flour
1 teaspoon salt
2/3 cup shortening
5 - 8 tablespoons ice cold water
Filling:
About 3 1/2 lbs peaches (so you end up with 6 cups sliced)
1 tablespoon fresh lemon juice
1/4 cup granulated sugar
1/4 cup light brown sugar
1/8 teaspoon cinnamon
sprinkle of nutmeg
1/8 teaspoon salt
2 tablespoons tapioca
To make the crust:
Combine flour and salt in a medium bowl. Cut in shortening using a pastry knife or 2 butter knives.
Sprinkle water into flour mixture one tablespoon at a time, tossing lightly with a fork. When it starts to come together, pick it up and form it into a ball. Divide the ball in half and flatten each half into a disc. Wrap each half in plastic wrap and refrigerate (it is SO much easier to work with cold dough if you are rolling it).
To make the filling:
Peel the peaches - if they are kind of hard, a vegetable peeler works just fine. If they are pretty soft, the peels may come off pretty easily. If it is giving you trouble, boil a big pot of water (and get an ice bath ready), make an "x" on the bottom of each peach and throw them in the water. Poach them for 2 minutes, take them out, and put them in the ice bath. Once they cool down a bit, try peeling them again and hopefully this helps!
Half and pit your peeled peaches and cut them into 1/3 inch slices. If you are doing the "mini" pies, chop them up roughly. Toss the peaches in a large bowl with the lemon juice.
In a small bowl, combine the sugars, cinnamon, nutmeg, salt, and tapioca. Toss this in with the peaches and stir to combine.
Put it all together:
Preheat the oven to 425 degrees.
For mason-jar pies - grab your 4oz mason jars and press pie dough into each jar, covering the bottoms and up the sides. You will want to use about half the dough. I probably start out making 7 jars just so I don't over-do it since you can always whip up a few more if you have too much filling.
Spoon filling into the jars up to the top. You can go a little over if you are going to bake them right away and don't need to worry about screwing the cap on. Go a little lighter on the filling if you are going to freeze them.
Once all the jars have filling in them, roll out the rest of the pie dough on a heavily floured surface with a heavily floured rolling pin. Use the lid of one of the jars to cut out circles in the dough and press it on top of the pie filling in the jar (push it down in there a bit so it is "in" the jar - it can get a little messy). Put a few slits in the top.
Place all the jars you are cooking on a foil lined baking sheet and bake for about 1/2 hour or until the pies are bubbling and brown on top.
For a traditional pie - take out your chilled dough discs and roll one of them out with a heavily floured rolling pin on a heavily floured surface.
Place the rolled out dough into a 9 inch pie plate. Lightly press it into place so there are no gaps between the crust and the pie plate. Pour the peach filling inside.
Ditto the rolling process with the second disc of dough (or make a lattice top if you are feeling fancy...). Gently place the second crust on top of the peach filling. Press the edges of the top and bottom crust together. Make some slits in the top of the pie and rub the crust with a little bit of milk (this makes it brown up reaaaal niiiice).
Bake pie for 20 min, reduce oven to 375 degrees and bake for another 30 to 40 min or until bubbly and brown (if browning too much, cover the pie loosely with foil). Cool pie completely if you don't want it to run (I dare you to try and cool this completely before devouring it).
NOTE: For the mason jar pies, if you want to freeze some for later, screw the lids on the pies before you bake them and stick 'em in the freezer. When you feel like having pie, take them out, remove the lids (important!), and place them on a foil lined baking sheet. Put the baking sheet with the pies in the oven and turn the oven on to 425 degrees and bake for about 45 minutes. The pies will defrost nicely in the preheating oven. Just keep an eye on them and take them out when they are bubbly and browning. MMMM...pie.
Sunday, June 2, 2013
Summer Lovin
We have been working a few new recipes these days so I think it is time to put up another blog post so that I can have them as part of my online collection! The photographers of the beautiful food have been given their kudos in the corresponding captions. I'll kick it off with the Lemon-Garlic Shrimp Skewers we made for dinner tonight. These were delicious and a great way to broaden your shrimp horizons...that is, if you are like me and have never grilled them before!
Next we have Cheddar Turkey Burgers with Mashed Avocado. MAN these were delicious. Flick and I are not generally huge fans of turkey burgers since they have such a narrow "perfect" window when they are not too dry. These are kept moist with some grated red onion and cheddar cheese. These will completely change your point of view on non-beef burgers, give them a chance.
Catfish always seems to end up with a cornmeal coating in our family - and the catfish meal we had a week or so ago is no exception. What makes it really awesome is the Quinoa Saute that we served on the side. This is a perfect summer side and loads you up with good-for-you quinoa and a decent serving of veggies.
The next two recipes are nods to some of the great food we have acquired from friends who have done some hunting/fishing over the fall and winter months. Our friends up in Steamboat provided us with some amazing ground elk and elk tenderloins. We incorporated the ground elk into our Shepard's Pie awhile back, but had been saving the tenderloins. We finally got to cooking them and did a really simple crock pot recipe that you could easily use for a beef tenderloin if game isn't your thing. They came out very flavorful and not tough at all - and elk is a very lean cut of meat!
The last recipe is a glaze for salmon that we have been using just about every other week on the Alaskan-caught salmon filets we were fortunate enough to receive from one of Flick's colleagues. Neither of us are huge salmon eaters, so when we came across this recipe we decided it was the best way to prepare this amazing fish so that we could thoroughly enjoy eating it. Happy summertime cooking everyone!
| Michael Weschler |
| Marcus Nilsson |
The next two recipes are nods to some of the great food we have acquired from friends who have done some hunting/fishing over the fall and winter months. Our friends up in Steamboat provided us with some amazing ground elk and elk tenderloins. We incorporated the ground elk into our Shepard's Pie awhile back, but had been saving the tenderloins. We finally got to cooking them and did a really simple crock pot recipe that you could easily use for a beef tenderloin if game isn't your thing. They came out very flavorful and not tough at all - and elk is a very lean cut of meat!
The last recipe is a glaze for salmon that we have been using just about every other week on the Alaskan-caught salmon filets we were fortunate enough to receive from one of Flick's colleagues. Neither of us are huge salmon eaters, so when we came across this recipe we decided it was the best way to prepare this amazing fish so that we could thoroughly enjoy eating it. Happy summertime cooking everyone!
Sunday, April 7, 2013
Back in the saddle again
Let's see if I still remember how to do this...
I feel a little sheepish that I just went off the radar without so much as a 'catch you all in a few months, I'm taking a break'. Part of the reason for that was because I didn't know I was taking a break, it just kind of happened! As much as I have enjoyed all this food blogging, since my 'real' job requires me to park myself in front of a computer for most hours of the day, it can be a bit of a struggle to continue that practice once I get home at night. So I took a hiatus and have been enjoying the fruits of my labor. I love having all my recipes on here! It makes meal planning SO much easier for me and we all benefit from me being happy, right? :).
That being said, we have had some new meals that I am anxious to share. I am veering away from the 5 meals a week format and will just push out a few new recipes here and there as we try something and decide to make it part of our regular rotation. Sound good? Great, let's roll:
I am really trying to up the vegetable count in our house. Ellie is a bit more picky now that she realizes she has choices in life, so we are doing a bit more with vegetables to try and entice her to eat them. Sometimes it is as simple as letting her eat them off of one of our plates (since that is so much cooler) but occasionally we need to sass them up a bit to tempt her discerning palate. That was the plan with Sweet Potato and Brie Flatbread, but it didn't really work out. I figured we were going to knock it out of the park: cheese, bread, and sweet potatoes...yum! Well, Flick and I thought so but Ellie wasn't so into it. Regardless, this is a great pseudo pizza and we thoroughly enjoyed it!
Christopher Baker
Spring is in the air here in Boulder (until Tuesday that is) so we figured we would throw some steaks on the grill as a nod to the warm weather and longer days. We usually just rub them down with oil and some salt and pepper, but this time around we made Spice-Rubbed New York Strip with Avocado Lime Salsa. I thought this was a great way to gussy up a nice steak - the rub added some flavor without overpowering the steak and avocado-on-anything is good for me so I called this recipe a winner.
There, I think that was a relatively successful jump back into things! I don't have any of my own pictures to go along with these recipes since I just last night decided to post them (thanks Christa!) - so the pictures above are professional and all the credit goes to the photographer. Oops, I mean, haven't my camera skills improved over the last few months? Bravo professionals. It's good to be back - I hope you all have a good week!
Wednesday, December 12, 2012
Pa-rump-a-pum-pum
Did you miss me? I took a little break last week - I really couldn't bear the thought of spending another second in front of a computer when I got home from work on Friday. I am sure there are others like me who can understand. Sitting at a desk all day makes me a little crazy. I try hard to get out at lunch for a run, bike ride, or some yoga - but some days it just doesn't happen. Don't be surprised if you come around the corner and see me unrolling my yoga mat at work on one of those busy days. A girl gets to feeling pent up with no decompression time.
We are gearing up for the Christmas holiday over here which means we have even less spare time than usual. That puts us right around 12 spare minutes a day. Bearing that in mind, we are being very crafty with our meals this week. When time gets tight we rely heavily on leftovers.
It was only a few short weeks ago that I was hateful towards my slow cooker...and I think I have used it every week since then. This past Sunday we were headed down to Denver for the day so I put together a Vegetable Stew (it is technically a chili but is not chili-like at all in my book - more like a tomato based stew) in the crock pot. It simmered away all day and made so much delicious stew that we are on our second night of eating it with plenty left to go (it freezes really well).
Another meal that is hearty and delicious (and really good leftover), is Shepard's Pie. This Shepard's Pie is a little more robust than what we grew up with. We are fortunate enough to have some ground Elk from our good friends up in Steamboat who have readily adopted the mountain lifestyle and went out and caught themselves an elk this year - pretty impressive. This was an awesome meal, and Ellie really liked it too which gives it bonus points in our book. There is a fair amount of prep time involved so when I found myself with some down(ish)-time (read: Ellie was napping) I went through all the steps and got the dish assembled, then stuck it in the fridge until we were about an hour or so from dinner. I didn't hear any complaints at our table.
Apparently we have all the right friends because we also have a mess of fresh caught Alaskan salmon in our freezer. Yes, we count our blessings. Neither one of us are huge salmon eaters but we are really excited to have this in our house. I haven't cooked salmon since college so I am a little rusty and it definitely showed in this recipe, Pineapple Teriyaki Salmon. I way overcooked the salmon...and the couscous (did you know that was possible?). The flavors were all wonderful but it was all terribly dry...as a foodie who appreciates a great cut of fish, I felt awful about it. But I am confident that the next set of filets will come out much better.
We had one of our cars in the shop this week which meant I was supposed to be riding my bike to and from work...except that we woke up to a rogue snow storm which pretty much annihilated that plan. This meant a lot of running around for all of us and only about 3 minutes to make dinner. Let me introduce you to the frozen ravioli. Once the water gets boiling, these little gems take about 3-4 minutes to cook. Pair that with a nice salad and you have yourself a meal. We don't shy away from these quick fixes as long as they don't become the norm. The fact is, there isn't always time to even whip together a quick meal from scratch - there are good choices out there and it just takes a little creativity to pull together a well rounded meal in a super short amount of time.
Last but not least is our chicken dish for the week. Chicken Thighs with Roasted Apples and Garlic. This wasn't anything wild and crazy but was a good, solid meal. We paired it with some white rice (brown rice doesn't go over so well with the hubby) and mixed veggies and we were off and running.
So there you have it, a mish-mash of recipes that will keep you well fed through all the shopping, baking, and celebrating that happens this time of year. I am going to try and get rolling on my Christmas cookies this weekend...the posts for the remainder of the year will probably be a little more varied since I get really excited about baking and hosting so don't be caught off guard. Take a minute to slow down and enjoy the season...remember how when you were younger, it took FOREVER for Christmas to come? We all need to work on getting back to that place so we can enjoy and appreciate the moments a whole lot more. Happy Holidays!
| Side crow in a suit...on a desk. I barely can do that on my mat. |
It was only a few short weeks ago that I was hateful towards my slow cooker...and I think I have used it every week since then. This past Sunday we were headed down to Denver for the day so I put together a Vegetable Stew (it is technically a chili but is not chili-like at all in my book - more like a tomato based stew) in the crock pot. It simmered away all day and made so much delicious stew that we are on our second night of eating it with plenty left to go (it freezes really well).
Another meal that is hearty and delicious (and really good leftover), is Shepard's Pie. This Shepard's Pie is a little more robust than what we grew up with. We are fortunate enough to have some ground Elk from our good friends up in Steamboat who have readily adopted the mountain lifestyle and went out and caught themselves an elk this year - pretty impressive. This was an awesome meal, and Ellie really liked it too which gives it bonus points in our book. There is a fair amount of prep time involved so when I found myself with some down(ish)-time (read: Ellie was napping) I went through all the steps and got the dish assembled, then stuck it in the fridge until we were about an hour or so from dinner. I didn't hear any complaints at our table.
Apparently we have all the right friends because we also have a mess of fresh caught Alaskan salmon in our freezer. Yes, we count our blessings. Neither one of us are huge salmon eaters but we are really excited to have this in our house. I haven't cooked salmon since college so I am a little rusty and it definitely showed in this recipe, Pineapple Teriyaki Salmon. I way overcooked the salmon...and the couscous (did you know that was possible?). The flavors were all wonderful but it was all terribly dry...as a foodie who appreciates a great cut of fish, I felt awful about it. But I am confident that the next set of filets will come out much better.
We had one of our cars in the shop this week which meant I was supposed to be riding my bike to and from work...except that we woke up to a rogue snow storm which pretty much annihilated that plan. This meant a lot of running around for all of us and only about 3 minutes to make dinner. Let me introduce you to the frozen ravioli. Once the water gets boiling, these little gems take about 3-4 minutes to cook. Pair that with a nice salad and you have yourself a meal. We don't shy away from these quick fixes as long as they don't become the norm. The fact is, there isn't always time to even whip together a quick meal from scratch - there are good choices out there and it just takes a little creativity to pull together a well rounded meal in a super short amount of time.
Last but not least is our chicken dish for the week. Chicken Thighs with Roasted Apples and Garlic. This wasn't anything wild and crazy but was a good, solid meal. We paired it with some white rice (brown rice doesn't go over so well with the hubby) and mixed veggies and we were off and running.
So there you have it, a mish-mash of recipes that will keep you well fed through all the shopping, baking, and celebrating that happens this time of year. I am going to try and get rolling on my Christmas cookies this weekend...the posts for the remainder of the year will probably be a little more varied since I get really excited about baking and hosting so don't be caught off guard. Take a minute to slow down and enjoy the season...remember how when you were younger, it took FOREVER for Christmas to come? We all need to work on getting back to that place so we can enjoy and appreciate the moments a whole lot more. Happy Holidays!
Friday, November 30, 2012
Now what?
The week after Thanksgiving is a tough one when it comes to cooking, especially when you are hosting...and all of your guests are staying with you. When guests are around just for the meal, it is easy to send them off with Tupperware containers full of tasty leftovers. When your guests are staying with you, well, you end the night with a pretty full refrigerator! Fortunately, no one was shy about whipping up turkey sandwiches, having mini-Thanksgiving dinners for lunch, and slowly working through 4 pies. That meant that there was no taking a break from cooking the week after Thanksgiving this year. Fortunately, my Mom was here to help. She took care of the first half of the week and then it was up to me to cover Flick, Ellie, and myself after my family headed back east.
Here are some recipes that yield such great results that you won't mind spending a little time in the kitchen for them. We'll start with Grilled Chicken Florentine Pasta. As is standard with spinach dishes, I added more than the recipe called for since it cooks down so much, and I like spinach. Ellie also enjoyed this meal, and actually had it for leftovers tonight!
My mom made a few polenta dishes for us growing up, and this was a great one. Flick is not wild about polenta but he didn't seem to have any problems having more than one helping of this meal. Polenta Pepper Torte is flavorful and satisfying - a good comfort food dish without absurd amounts of cheese or cream. Not that there is anything wrong with cheese...
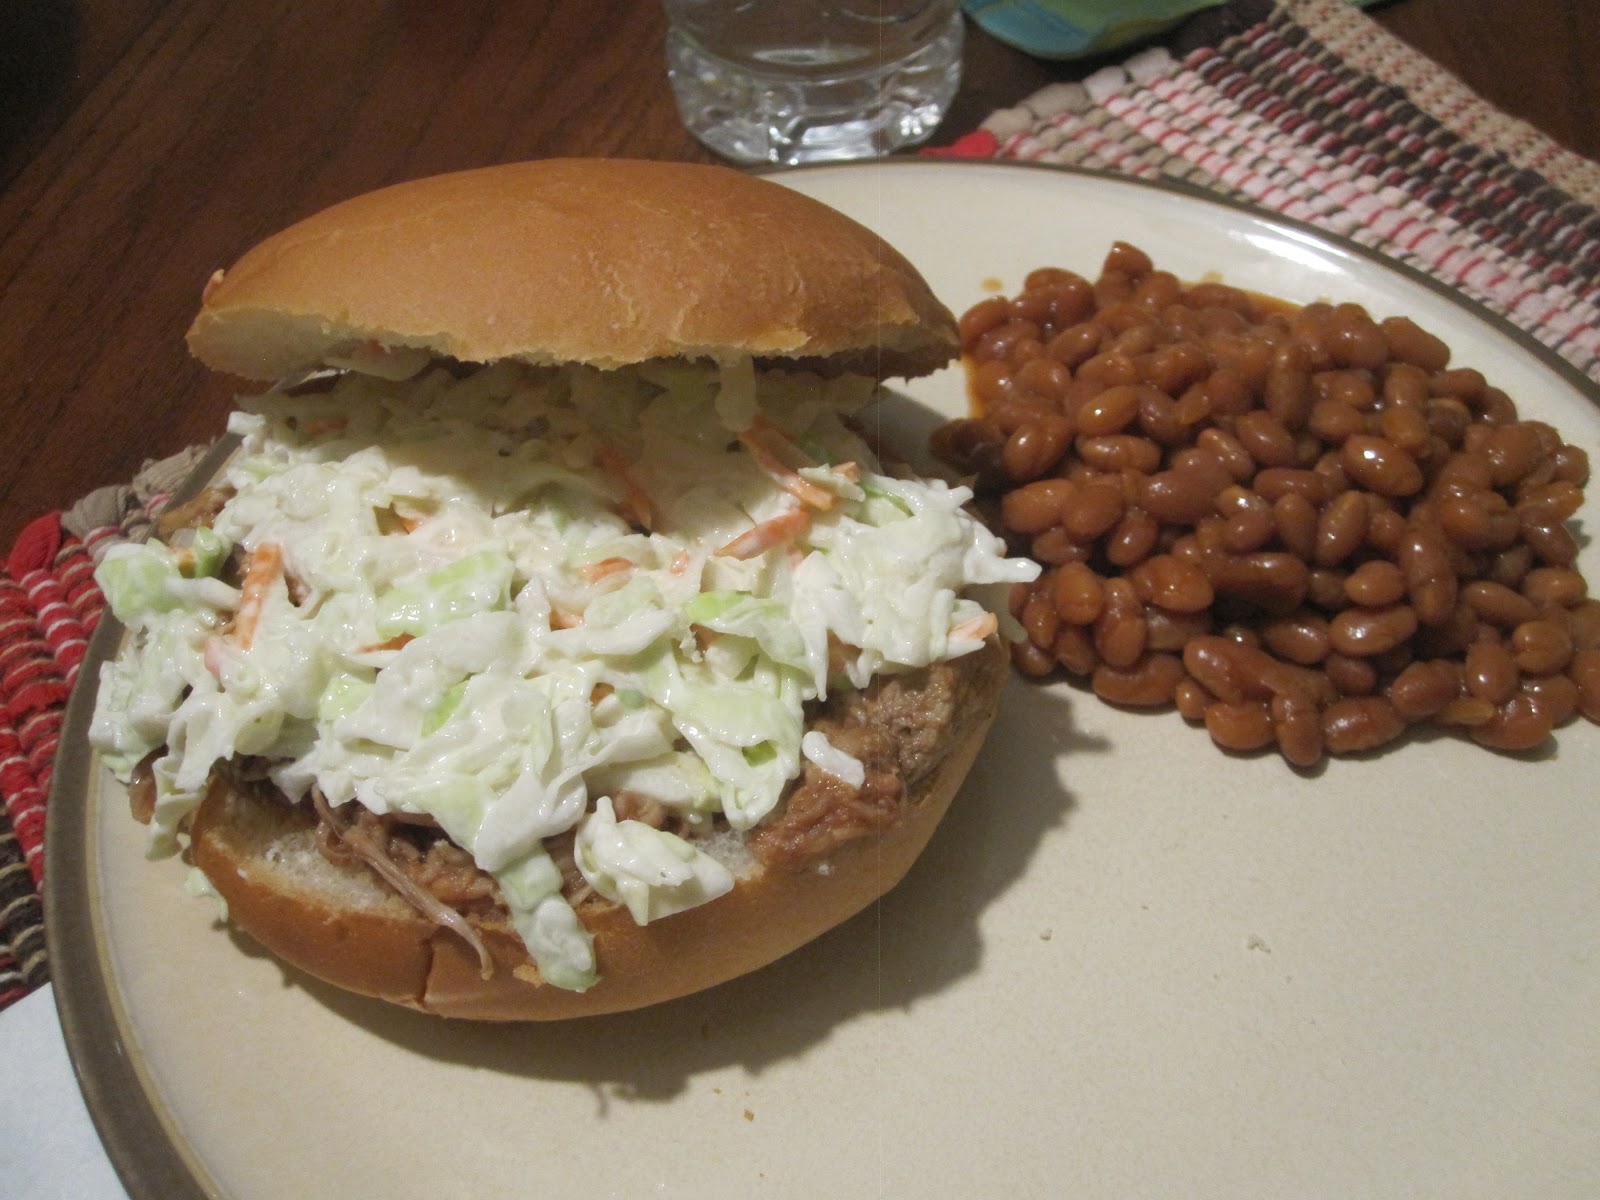
Remember when I said that I had a love-hate relationship with our slow cooker? Well, here is a recipe that I love in my slow cooker. Slow-Cooked Pulled Pork. The beauty of this recipe, it is simple to put together. You won't have to wake up extra early in the morning to get it going, and it cooks for 8-10 hours so it will be happily simmering along while you go about your day. This was one of the recipes my mom made so she did all the prep while I did some shredding...and plenty of eating. She added some BBQ sauce to the final product to give it a little more flavor, but it was juicy and delicious and made for a great lunch at work this week.
Another recipe from my mom was Halibut with Mango Salsa. This isn't your typical Mango Salsa; it plays to some different senses with a full teaspoon of cinnamon. Delicious! We really liked this recipe, and actually, Ellie did too! She didn't eat much salsa but the fish was right up her alley.
Finally, this Minestrone recipe is a good meal for a cold wintery day. It makes a pretty good amount of food and again, is baby friendly (once we drained out the broth and made sure it was not too hot). With any luck, next week we'll have some Minestrone weather, enjoy the meals!
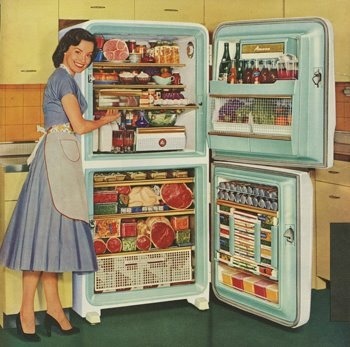
| This refrigerator is just the right age for our kitchen... |
Here are some recipes that yield such great results that you won't mind spending a little time in the kitchen for them. We'll start with Grilled Chicken Florentine Pasta. As is standard with spinach dishes, I added more than the recipe called for since it cooks down so much, and I like spinach. Ellie also enjoyed this meal, and actually had it for leftovers tonight!
My mom made a few polenta dishes for us growing up, and this was a great one. Flick is not wild about polenta but he didn't seem to have any problems having more than one helping of this meal. Polenta Pepper Torte is flavorful and satisfying - a good comfort food dish without absurd amounts of cheese or cream. Not that there is anything wrong with cheese...
Remember when I said that I had a love-hate relationship with our slow cooker? Well, here is a recipe that I love in my slow cooker. Slow-Cooked Pulled Pork. The beauty of this recipe, it is simple to put together. You won't have to wake up extra early in the morning to get it going, and it cooks for 8-10 hours so it will be happily simmering along while you go about your day. This was one of the recipes my mom made so she did all the prep while I did some shredding...and plenty of eating. She added some BBQ sauce to the final product to give it a little more flavor, but it was juicy and delicious and made for a great lunch at work this week.
Another recipe from my mom was Halibut with Mango Salsa. This isn't your typical Mango Salsa; it plays to some different senses with a full teaspoon of cinnamon. Delicious! We really liked this recipe, and actually, Ellie did too! She didn't eat much salsa but the fish was right up her alley.
Finally, this Minestrone recipe is a good meal for a cold wintery day. It makes a pretty good amount of food and again, is baby friendly (once we drained out the broth and made sure it was not too hot). With any luck, next week we'll have some Minestrone weather, enjoy the meals!
Saturday, November 24, 2012
Thank goodness for Thanksgiving
We are going to cut to the chase pretty quickly here since we have a lot of material to cover. Thanksgiving is officially over, the turkey has been consumed, pies have been polished off, and plenty of wine has been imbibed. All in all I would say it was a pretty successful holiday.
We started our Thanksgiving with a self-governed Turkey Trot. A nice 3.4 mile jog on the trails out near our home. It was a beautiful morning to have everyone out and about and there were tons of other people working up their appetites along with us. We came home and had some french toast and started pulling everything together.
The dinner assembly started on Tuesday night. The key to these multiple dish dinner events is to get as much prep work done ahead of time as possible. We laid out the menu and figured out what could be made ahead of time, and what would be best served up fresh from the oven. Here is our menu:

Turkey
Mashed Potatoes
Rosemary Mashed Sweet Potatoes with Shallots
Green Beans
Pecan Rolls
Cranberry Apple Relish
Pear and Candied Walnut Salad
Memere's Stuffing
Applejack Spiked Hot Cider
Apple Pie
Pumpkin Pie
Mud Pie
There were 6 of us (plus Ellie) for dinner. This may seem like an aggressive line-up, however, who wants a Thanksgiving dinner with no leftovers? Not this girl. The make-way-ahead dishes were the Cranberry Sauce and the Mud Pie.
This was a new Cranberry Sauce for us but has definitely earned its place in the regular rotation. It was so simple and had such great flavor. We made it 2 days before Thanksgiving and it was all ready to go come dinnertime on Thursday night.
Mud Pie is officially part of our Thanksgiving pie tradition because it is Flick's favorite. What is not to like about an Oreo crust filled with coffee ice cream and a fudge topping? You can sub in other types of ice cream (mint chocolate chip and caramel jump out as good options) - but the coffee is the big winner in our household. Since we had 3 pies in queue, we ended up making this in a non-stick cake pan and it worked out great.

The day before Thanksgiving we started in on the rest of the pies and half of the stuffing. The stuffing literally cooks all day long, and is SO worth it. This is the best stuffing ever, we just love it. This is my Memere's stuffing recipe so it has been in the family for awhile and continues to go strong on the Thanksgiving table. For the apple pie - we used the food processor with the "slicing" adapter to significantly cut down on the prep time.
The pumpkin pie was pretty straightforward. Even though it only requires a single, bottom crust, we made a double crust so that we were sure to have plenty of crust for our slightly large (9 1/2 inch) pie plate. Mind you, this was determined after we tried with just a single crust and it didn't fit :) This is why starting early is key!
Allie was in charge of making the Applejack Spiked Hot Cider on Thanksgiving day and it was a big hit. This is something that you can assemble on the stovetop and leave simmering in the crockpot all day to fill your house with the aroma of hot cider, cinnamon, and cloves.
My mom started up the second batch of stuffing just before lunch so it could cook for a full 6 hours on the double boiler. We were shooting to eat dinner around 5pm so we got our 18 pound turkey in the oven around 1:15. We cook our turkey in a bag like this one; it cuts down on the cooking time and keeps the bird from drying out too much. We just used the recipe that came with the oven bag and the flavor and juiciness was perfect. Our turkey took longer than anticipated (it was still pretty cold and slightly icy when I put it in the oven) so we didn't end up eating until about 6pm, but as everyone kept reminding me, it's not that big of a deal to wait a little while longer for a delicious meal. Tough to swallow as the chef, but it was definitely worth the wait.
While the turkey was in the oven, we made the mashed potatoes and sweet potatoes. Our pecan rolls needed to bake for 15-20 minutes so we had to wait for the bird to come out of the oven before we could cook them. The rolls suffered the most from the longer cooking time on the Turkey; they had risen to their full potential by the time the bird was supposed to be ready, and subsequently deflated while the Turkey was hanging in the oven. They still tasted delicious and were a popular side on the table.
The salad and the green beans were really easy to whip together in the last few minutes before dinner. I made the dressing and candied walnuts earlier in the morning and just had to slice the pears and toss the lettuce at crunch time. We kept the green beans simple (just steamed them) so they were really easy to rinse, snap, and steam.
All in all it was an awesome meal with our family and it was fun and only slightly stressful to put it all together. Remember that table that we ordered awhile back? Well, it hasn't arrived yet so we made do with our current table and fit just fine. All the food hung out on a foldable card table and people were free to get up and refill their plates as needed. What a great holiday! We have taken down the Halloween/Thanksgiving decorations, Flick went and bought some Christmas lights, and we are working our way into full on Ho Ho Holiday mode :) I am a total dork this time of year and am so excited for upcoming Christmas's as Ellie gets more and more into the festivities. Happy Thanksgiving everyone, I hope you all enjoyed a fabulous meal with your family and friends!
We started our Thanksgiving with a self-governed Turkey Trot. A nice 3.4 mile jog on the trails out near our home. It was a beautiful morning to have everyone out and about and there were tons of other people working up their appetites along with us. We came home and had some french toast and started pulling everything together.
The dinner assembly started on Tuesday night. The key to these multiple dish dinner events is to get as much prep work done ahead of time as possible. We laid out the menu and figured out what could be made ahead of time, and what would be best served up fresh from the oven. Here is our menu:
Turkey
Mashed Potatoes
Rosemary Mashed Sweet Potatoes with Shallots
Green Beans
Pecan Rolls
Cranberry Apple Relish
Pear and Candied Walnut Salad
Memere's Stuffing
Applejack Spiked Hot Cider
Apple Pie
Pumpkin Pie
Mud Pie
There were 6 of us (plus Ellie) for dinner. This may seem like an aggressive line-up, however, who wants a Thanksgiving dinner with no leftovers? Not this girl. The make-way-ahead dishes were the Cranberry Sauce and the Mud Pie.
This was a new Cranberry Sauce for us but has definitely earned its place in the regular rotation. It was so simple and had such great flavor. We made it 2 days before Thanksgiving and it was all ready to go come dinnertime on Thursday night.
Mud Pie is officially part of our Thanksgiving pie tradition because it is Flick's favorite. What is not to like about an Oreo crust filled with coffee ice cream and a fudge topping? You can sub in other types of ice cream (mint chocolate chip and caramel jump out as good options) - but the coffee is the big winner in our household. Since we had 3 pies in queue, we ended up making this in a non-stick cake pan and it worked out great.
The day before Thanksgiving we started in on the rest of the pies and half of the stuffing. The stuffing literally cooks all day long, and is SO worth it. This is the best stuffing ever, we just love it. This is my Memere's stuffing recipe so it has been in the family for awhile and continues to go strong on the Thanksgiving table. For the apple pie - we used the food processor with the "slicing" adapter to significantly cut down on the prep time.
The pumpkin pie was pretty straightforward. Even though it only requires a single, bottom crust, we made a double crust so that we were sure to have plenty of crust for our slightly large (9 1/2 inch) pie plate. Mind you, this was determined after we tried with just a single crust and it didn't fit :) This is why starting early is key!
Allie was in charge of making the Applejack Spiked Hot Cider on Thanksgiving day and it was a big hit. This is something that you can assemble on the stovetop and leave simmering in the crockpot all day to fill your house with the aroma of hot cider, cinnamon, and cloves.
| The turkey is done! |
While the turkey was in the oven, we made the mashed potatoes and sweet potatoes. Our pecan rolls needed to bake for 15-20 minutes so we had to wait for the bird to come out of the oven before we could cook them. The rolls suffered the most from the longer cooking time on the Turkey; they had risen to their full potential by the time the bird was supposed to be ready, and subsequently deflated while the Turkey was hanging in the oven. They still tasted delicious and were a popular side on the table.
The salad and the green beans were really easy to whip together in the last few minutes before dinner. I made the dressing and candied walnuts earlier in the morning and just had to slice the pears and toss the lettuce at crunch time. We kept the green beans simple (just steamed them) so they were really easy to rinse, snap, and steam.
| Candied walnuts for the salad |
Friday, November 16, 2012
Flakey - and I'm not talking about a crust
Well, I completely flaked on blogging last week. That's right, I didn't give it a thought until Sunday night. By that point, I figured with the 100+ recipes we have accumulated over the months, one week wouldn't be missed, right? We have a lot of family staying with us through Christmas so it is easy to lose track of to-do's when you are hanging out together in the evenings. Not a bad thing in my opinion, this is a hobby after all...unless someone wants to pay me for it :)
We are working up towards our big Thanksgiving Day feast next week. I have the menu planned, turkey ordered, and we will do all the shopping this weekend. I am pretty excited for it - Thanksgiving happens to be one of my favorite holidays. I think it has something to do with the fact that the Christmas season "officially" starts once the leftovers from Thanksgiving are packed up. I am definitely looking forward to reporting back on our Thanksgiving festivities - mashed potatoes, apple pie, and remembering how fortunate we are to have such an incredible life. Does it get much better than that?
In the poultry department, one of the recipes my mom brought out with her last time they came to visit was Baked Chicken Po Boy Sandwiches. Mmmmmm...these were yummy. Breaded chicken on bread - sign me up. These were really good and are definitely kid friendly...a little much for Ellie but she only has 8 teeth so that could have something to do with it.
Another recipe my mom brought out was Wedding Soup. We used to have this recipe when I was growing up; it is really great on cold, wintery days and makes enough that you can have some leftovers to freeze and take out next time the snow starts to fly.
A lot of people live by the slow cooker. I have a lukewarm feeling towards ours. I get why people love them; you come home to a warm dinner with no post-work prep time. Where I get hung up on slow cooker meals is when they don't work out. We have very few crock pot meals that I have worked into our regular rotation. We tried Curried Lentil Tomato Soup, and even after 8 hours of simmering in the crockpot, I came home to undercooked veggies and firm lentils. Bleh. I was pretty disappointed to say the least. My mom prepped a much more delectable Baby Back Rib recipe in the crockpot for us. Pair it with some Mac n' Cheese and some peas and you have yourself a very American comfort food dinner.
One of the nights that Flick's mom was out we had Butternut Squash and Mushroom Tarts with Gruyere cheese. Oh man. This sounds like it would take hours upon hours to put together, but we were able to make it in the 40 minute window after work one Friday night. I highly recommend giving this a try - there are a lot of little steps involved but read through it a few times, formulate a plan, and get to it.
Finally, for a taste of some southern cooking (there is okra in it!) we made Chicken and Sausage Gumbo. This was a solid, tasty meal that will definitely be a part of our regular rotation. We are not huge okra fans but in this one-dish meal it adds a nice flavor.
I hope everyone has a scrumptious Thanksgiving with family and friends, we'll run through the festivities next week!
We are working up towards our big Thanksgiving Day feast next week. I have the menu planned, turkey ordered, and we will do all the shopping this weekend. I am pretty excited for it - Thanksgiving happens to be one of my favorite holidays. I think it has something to do with the fact that the Christmas season "officially" starts once the leftovers from Thanksgiving are packed up. I am definitely looking forward to reporting back on our Thanksgiving festivities - mashed potatoes, apple pie, and remembering how fortunate we are to have such an incredible life. Does it get much better than that?
In the poultry department, one of the recipes my mom brought out with her last time they came to visit was Baked Chicken Po Boy Sandwiches. Mmmmmm...these were yummy. Breaded chicken on bread - sign me up. These were really good and are definitely kid friendly...a little much for Ellie but she only has 8 teeth so that could have something to do with it.
Another recipe my mom brought out was Wedding Soup. We used to have this recipe when I was growing up; it is really great on cold, wintery days and makes enough that you can have some leftovers to freeze and take out next time the snow starts to fly.
A lot of people live by the slow cooker. I have a lukewarm feeling towards ours. I get why people love them; you come home to a warm dinner with no post-work prep time. Where I get hung up on slow cooker meals is when they don't work out. We have very few crock pot meals that I have worked into our regular rotation. We tried Curried Lentil Tomato Soup, and even after 8 hours of simmering in the crockpot, I came home to undercooked veggies and firm lentils. Bleh. I was pretty disappointed to say the least. My mom prepped a much more delectable Baby Back Rib recipe in the crockpot for us. Pair it with some Mac n' Cheese and some peas and you have yourself a very American comfort food dinner.
One of the nights that Flick's mom was out we had Butternut Squash and Mushroom Tarts with Gruyere cheese. Oh man. This sounds like it would take hours upon hours to put together, but we were able to make it in the 40 minute window after work one Friday night. I highly recommend giving this a try - there are a lot of little steps involved but read through it a few times, formulate a plan, and get to it.
Finally, for a taste of some southern cooking (there is okra in it!) we made Chicken and Sausage Gumbo. This was a solid, tasty meal that will definitely be a part of our regular rotation. We are not huge okra fans but in this one-dish meal it adds a nice flavor.
I hope everyone has a scrumptious Thanksgiving with family and friends, we'll run through the festivities next week!
Friday, November 2, 2012
Happy Halloween!
I really love this time of year. I know I have already harped on how great the transition into fall and winter comfort food is, so don't even get me started on the Holidays. It all kicks off by getting dressed up in a costume and collecting candy from perfect strangers. I haven't quite figured out how we get Ellie to understand that on this one day, with Mom and Dad, it is okay to accept candy from a stranger. Otherwise, run.
We went down to Pearl Street this year for the Munchkin Masquerade. It is the place see and be seen on Halloween. There are some pretty amazing costumes (think an entire family dressed up as the Incredibles...) and all the stores hand out candy to the kiddos. Needless to say, Ellie was completely overwhelmed but happily took it all in, held safely in Mom and Dad's arms. She was a dinosaur this year (and really excited about it):
Slightly more ferocious than the ladybug costume she donned last Halloween:
Apparently she was so worn out from the sleeping and milk drinking at the Munchkin Masquerade that she fell asleep when we set her up for her post-Pearl Street diaper change:
Too cute. Along with getting dressed up for Halloween, we always enjoy carving pumpkins. Flick was traveling during primo pumpkin carving time this year, so my mom and I spent an evening carefully cutting away the perfect Halloween designs in our pumpkins. It is a good thing that Halloween is over because the animals have been feasting on our artwork for the past few days and there is not much carving left to speak of. They were cool while they lasted though:
The pumpkins may be done but we are still feasting on the roasted pumpkin seeds that we meticulously separated from the "goo" on the insides of the pumpkins while carving. For tasty roasted pumpkin seeds, separate the seeds from the pulp. Rinse thoroughly to get all the goop off and soak in a clean bowl of salted water overnight (just a few shakes should do it). Preheat your oven to 375 degrees. Drain the seeds and cover a baking sheet with foil; spray with cooking spray or rub some oil on the foil to grease it. Spread the seeds in a thin layer on the sheet and sprinkle with a little more salt. Bake for 10 minutes. Using a spatula, flip the seeds and bake for another 10 minutes. Allow to cool slightly before enjoying!
If you are tough like we are, you can eat the entire seed, hull and all (yeah, so it is a little strange but that is where all the salt is!), otherwise, peel off the hull and enjoy the little green pepita inside!
We'll start our meal chat with Enchilada Casserole. We have featured this meal before and I brought it out again while my parents were in town. Since my dad is lactose intolerant, we used cheddar cheese in place of monterey jack (cheddar and muenster are fine for him!) and he seemed to really enjoy it, as did my mom and I.
Since the Enchilada Casserole only uses 4 wraps, Flick and I used the rest of them earlier in the week for Grilled BBQ Chicken wraps. These are great on the grill year round and are so easy to make. They are pretty kid friendly too so hopefully the whole family can enjoy them together.
Shrimp Fra Diavolo is another one of those solid meals that tastes more gourmet than the short list of ingredients and rapid cook time implies. I love meals like this, they are real confidence boosters. This dish doesn't pack as much heat as the name and ingredients imply.
I made Flick and I some Honey Cashew Chicken with rice for a good healthy dose of vegetables one night. I really like this recipe and love that it uses edamame - something that we don't often cook with but that has a really good flavor and increases the heartiness factor of a dish in a very healthy way.
Our vegetarian meal was Falafel Pitas. YUM! I love falafel and these were so easy to make. You could easily make a double batch, shape the patties, and freeze them for future use. Just take them out, defrost, and continue forth with pan-frying them for a quick, healthy, tasty meal on a rushed weeknight. You will have to use your imagination on these because we wolfed them down before getting the camera out. I really enjoyed the sauce that went along with them and Ellie actually ate it off the top of her falafel - so that gives you some indication of how delicious it was. Hope you all had a great Halloween, happy cooking!
We went down to Pearl Street this year for the Munchkin Masquerade. It is the place see and be seen on Halloween. There are some pretty amazing costumes (think an entire family dressed up as the Incredibles...) and all the stores hand out candy to the kiddos. Needless to say, Ellie was completely overwhelmed but happily took it all in, held safely in Mom and Dad's arms. She was a dinosaur this year (and really excited about it):
Slightly more ferocious than the ladybug costume she donned last Halloween:
Apparently she was so worn out from the sleeping and milk drinking at the Munchkin Masquerade that she fell asleep when we set her up for her post-Pearl Street diaper change:
Too cute. Along with getting dressed up for Halloween, we always enjoy carving pumpkins. Flick was traveling during primo pumpkin carving time this year, so my mom and I spent an evening carefully cutting away the perfect Halloween designs in our pumpkins. It is a good thing that Halloween is over because the animals have been feasting on our artwork for the past few days and there is not much carving left to speak of. They were cool while they lasted though:
The pumpkins may be done but we are still feasting on the roasted pumpkin seeds that we meticulously separated from the "goo" on the insides of the pumpkins while carving. For tasty roasted pumpkin seeds, separate the seeds from the pulp. Rinse thoroughly to get all the goop off and soak in a clean bowl of salted water overnight (just a few shakes should do it). Preheat your oven to 375 degrees. Drain the seeds and cover a baking sheet with foil; spray with cooking spray or rub some oil on the foil to grease it. Spread the seeds in a thin layer on the sheet and sprinkle with a little more salt. Bake for 10 minutes. Using a spatula, flip the seeds and bake for another 10 minutes. Allow to cool slightly before enjoying!
If you are tough like we are, you can eat the entire seed, hull and all (yeah, so it is a little strange but that is where all the salt is!), otherwise, peel off the hull and enjoy the little green pepita inside!
We'll start our meal chat with Enchilada Casserole. We have featured this meal before and I brought it out again while my parents were in town. Since my dad is lactose intolerant, we used cheddar cheese in place of monterey jack (cheddar and muenster are fine for him!) and he seemed to really enjoy it, as did my mom and I.
Since the Enchilada Casserole only uses 4 wraps, Flick and I used the rest of them earlier in the week for Grilled BBQ Chicken wraps. These are great on the grill year round and are so easy to make. They are pretty kid friendly too so hopefully the whole family can enjoy them together.
Shrimp Fra Diavolo is another one of those solid meals that tastes more gourmet than the short list of ingredients and rapid cook time implies. I love meals like this, they are real confidence boosters. This dish doesn't pack as much heat as the name and ingredients imply.
I made Flick and I some Honey Cashew Chicken with rice for a good healthy dose of vegetables one night. I really like this recipe and love that it uses edamame - something that we don't often cook with but that has a really good flavor and increases the heartiness factor of a dish in a very healthy way.
Our vegetarian meal was Falafel Pitas. YUM! I love falafel and these were so easy to make. You could easily make a double batch, shape the patties, and freeze them for future use. Just take them out, defrost, and continue forth with pan-frying them for a quick, healthy, tasty meal on a rushed weeknight. You will have to use your imagination on these because we wolfed them down before getting the camera out. I really enjoyed the sauce that went along with them and Ellie actually ate it off the top of her falafel - so that gives you some indication of how delicious it was. Hope you all had a great Halloween, happy cooking!
Friday, October 26, 2012
Freezer friendly
One of the keys to homemade dinner success in our household is the ever present freezer meal. When Flick is on the road I live by leftovers. There is little time for cooking in the short time between when Ellie and I get home from daycare and when she is getting ready for bed. That means we plan ahead and have plenty of insta-meals at the ready. As much as my sisters and I begged for those Kids Cuisine TV dinners when we were younger, our freezer meals are all from scratch theses days.
Flick and I had planned to make some of these meals prior to Ellie's arrival so that we would have a freezer full of food to siphon off of in the weeks following her birth, however, Ellie had other plans. When she decided to make her entrance a few weeks before my due date, Flick ended up running back home from hospital to whip up some lasagna and chili to tide us over before my folks came out. He's the best. These meals are all great as leftovers. Cook them, let them cool, and freeze them in individual portions. Take them out a day or so early and let them thaw in the fridge. As a forewarning, there are no photos for these foods (yet) - I'll get those up ASAP...but some recipes need to be made and photographed first!
Lasagna is a freezer friendly no brainier. It makes a large amount of food, freezes really well, and tastes quite good reheated. I have two lasagna recipes, one is a vegetarian lasagna and one is a meat lasagna. The vegetarian recipe is super light and would be great even in the summer. The meat is a little more hearty but very delicious, we have some in the freezer as we speak.
Chili is another great meal that reheats well. You can take chili from a frozen block and throw it in a saucepan on a medium to low temperature and break it up as it warms. In thawing it on the stovetop, you get the added bonus of your home filling with the aroma of a fresh batch of warm chili. If you are feeling ambitious, make a double portion and you have that many more meals ready to go. We have had this recipe since our Boston days and both really love it. Recently we made it and let it simmer in a crock pot for Fall Fest at my office. Feel free to get a little creative with your chili and tailor it to the tastes of your family.
Forget Marie Callenders, you can freeze your own chicken pot pie that may save you from eating 6 sticks of butter in one sitting. Just saying. To keep the crust from being soggy when you reheat it, consider warming it in a preheated oven or toaster oven.
Meatballs. Need I say more? Make a batch of meatballs, freeze them, and you can have meatball subs or spaghetti and meatballs in a flash. If you don't do beef, sub in ground turkey or chicken. These little guys are perfect since you can take out just as many as you need that day and heat them up quick.
Don't fear the freezer - as long as you take the time to store your food properly, it will taste just as delicious as the day you made it.
Flick and I had planned to make some of these meals prior to Ellie's arrival so that we would have a freezer full of food to siphon off of in the weeks following her birth, however, Ellie had other plans. When she decided to make her entrance a few weeks before my due date, Flick ended up running back home from hospital to whip up some lasagna and chili to tide us over before my folks came out. He's the best. These meals are all great as leftovers. Cook them, let them cool, and freeze them in individual portions. Take them out a day or so early and let them thaw in the fridge. As a forewarning, there are no photos for these foods (yet) - I'll get those up ASAP...but some recipes need to be made and photographed first!
Lasagna is a freezer friendly no brainier. It makes a large amount of food, freezes really well, and tastes quite good reheated. I have two lasagna recipes, one is a vegetarian lasagna and one is a meat lasagna. The vegetarian recipe is super light and would be great even in the summer. The meat is a little more hearty but very delicious, we have some in the freezer as we speak.
Chili is another great meal that reheats well. You can take chili from a frozen block and throw it in a saucepan on a medium to low temperature and break it up as it warms. In thawing it on the stovetop, you get the added bonus of your home filling with the aroma of a fresh batch of warm chili. If you are feeling ambitious, make a double portion and you have that many more meals ready to go. We have had this recipe since our Boston days and both really love it. Recently we made it and let it simmer in a crock pot for Fall Fest at my office. Feel free to get a little creative with your chili and tailor it to the tastes of your family.
Forget Marie Callenders, you can freeze your own chicken pot pie that may save you from eating 6 sticks of butter in one sitting. Just saying. To keep the crust from being soggy when you reheat it, consider warming it in a preheated oven or toaster oven.
Meatballs. Need I say more? Make a batch of meatballs, freeze them, and you can have meatball subs or spaghetti and meatballs in a flash. If you don't do beef, sub in ground turkey or chicken. These little guys are perfect since you can take out just as many as you need that day and heat them up quick.
Don't fear the freezer - as long as you take the time to store your food properly, it will taste just as delicious as the day you made it.
Friday, October 19, 2012
Streamlining
I believe I have previously alluded to the book I am currently reading: The Joy of Less: A minimalist living guide. The whole idea of the minimalist lifestyle is to live with less "stuff" which ultimately gives you more time and space to enjoy doing the things you love. It is an idea that I have started to employ around our house (not to the extremes mentioned in the book; the only piece of furniture in the author's bedroom is a futon mattress on the floor...slightly excessive, er, minimalist). At home, I am really trying to keep clutter to a minimum and get rid of the things that we don't really need. There are so many ways to streamline our lives.
I have had this recipe for Swedish Meatballs cut out since we lived in Boston. When I first started gathering recipes, I was putting every
recipe that sounded good into a sticky back photo book. Needless to
say, I was filling up these books pretty quickly and still rotating
through the same old recipes. Flick suggested that I start actually
making the recipes before putting them in the book so that I have a
comprehensive collection of recipes that have already been vetted. He's so smart...and that was much more efficient. With this blog, I have found that I am able to further condense my recipe
collection into my online recipe book. No more piles of paper needed, we just keep everything organized in a nice, searchable format online. Along the same lines, the whole goal of this blog is to share recipes that taste great but
that don't require a lot of pomp and circumstance to pull together. In theory, I am pulling together a list of minimalist dinner recipes - guess I was destined to start tracking in this direction!
A quick way to put together an after work chicken dish is with Chicken Chilaquiles. This recipe uses rotisserie chicken to cut down on prep time and carries just a tiny bit of spice. Don't fear the heat - we are not big spicy food fans in our family so if we can take it you know it has to be pretty mild.
Another recipe that we have had since Boston, but that I have actually been cooking for years, is Smothered Pork Chops with Thyme. This is a good fall recipe served up with mashed potatoes and some veggies. To make the pork chop baby friendly, we threw it in the food processor with some of the sauce and Ellie loved it.

Two recipes that we have previously featured but that have been out of the loop for awhile are Tuna Noodle Casserole (big hit with Ellie) and Monterey Jack, Corn, and Roasted Red Pepper Risotto. That's right, we made a risotto after work and had it ready to go at 6pm for dinner with Ellie. Nothing is impossible with a little bit of planning and the drive to get it done.
A quick way to put together an after work chicken dish is with Chicken Chilaquiles. This recipe uses rotisserie chicken to cut down on prep time and carries just a tiny bit of spice. Don't fear the heat - we are not big spicy food fans in our family so if we can take it you know it has to be pretty mild.
Another recipe that we have had since Boston, but that I have actually been cooking for years, is Smothered Pork Chops with Thyme. This is a good fall recipe served up with mashed potatoes and some veggies. To make the pork chop baby friendly, we threw it in the food processor with some of the sauce and Ellie loved it.
Two recipes that we have previously featured but that have been out of the loop for awhile are Tuna Noodle Casserole (big hit with Ellie) and Monterey Jack, Corn, and Roasted Red Pepper Risotto. That's right, we made a risotto after work and had it ready to go at 6pm for dinner with Ellie. Nothing is impossible with a little bit of planning and the drive to get it done.
Subscribe to:
Posts (Atom)